Running PC games natively on standalone VR headsets without a gaming rig, Wi-Fi streaming, or cloud subscription is now possible through WinlatorXR. By integrating Wine, Box64, dynamic translation layers, and OpenXR APIs into a single package, WinlatorXR lets Meta Quest 3, Meta Quest 3S, Pico 4 Ultra, and other Android-based XR headsets execute Windows desktop software directly on their mobile ARM processors.
Because WinlatorXR requires low-level system permissions and custom graphics driver access, it is not hosted on official app stores like the Meta Quest Store or Pico Store. Installing WinlatorXR requires sideloading—a standard process for installing third-party Android packages (.apk files) onto your headset.
This comprehensive guide covers developer account setup, SideQuest sideloading methods, first-time container initialization, and PC game installation on your VR headset.
What You Need Before Starting
Before installing WinlatorXR, assemble the following hardware, software, and account access:
-
Supported VR Headset: Meta Quest 3, Quest 3S, Quest 2, or Pico 4 Ultra running the latest firmware update.
-
PC or Android Device: Used to install SideQuest and transfer APKs to the headset (Windows, Mac, Linux, or Android smartphone).
-
USB-C Data Cable: High-quality data transfer cable to bridge your headset to your computer/phone.
-
Official Developer Account: Free Meta or Pico developer profile to toggle Developer Mode on your headset.
-
WinlatorXR APK File: Official release package downloaded directly from the developer’s GitHub releases page.
Step 1: Enabling Developer Mode on Your Headset
To sideload custom Android packages, your headset’s operating system must have Developer Mode enabled. This unlocks Android Debug Bridge (ADB) communication via USB.
Enabling Developer Mode on Meta Quest (Quest 3 / 3S / 2)
-
Go to the Meta Developer Portal (
developer.oculus.com) and log in with your primary Meta account. -
Click Create Organization, enter a name (any custom name works), and accept the Developer Agreement.
-
Verify your developer account by adding two-factor authentication (2FA) or a payment method.
-
Open the Meta Horizon Mobile App on your smartphone.
-
Go to Menu > Devices, select your connected Meta Quest headset, and navigate to Headset Settings.
-
Select Developer Mode (or Developer Settings) and toggle the switch to ON.
-
Restart your Meta Quest headset.
Enabling Developer Mode on Pico Headsets (Pico 4 / Pico 4 Ultra)
-
Put on your Pico headset and open Settings.
-
Navigate to General > About.
-
Scroll down to Software Version and click it 7 times consecutively until a popup says “You are now a developer.”
-
Go back to the main Settings menu and select the newly unlocked Developer tab.
-
Toggle USB Debugging to ON.
Step 2: Sideloading WinlatorXR via SideQuest
SideQuest is the standard tool for managing sideloaded software and executing ADB commands on standalone VR devices. You can use either SideQuest Advanced (Desktop) or SideQuest Easy Installer (Web/Mobile).
Step-by-Step Installation Procedure
Step 3: Initializing Your First WinlatorXR Container
Once WinlatorXR is installed, you must build an emulation environment (a “container”) that mimics a Windows 10/11 operating system environment.
Recommended Baseline Container Configuration
-
Launch WinlatorXR and tap the + (Plus) icon in the top bar to open the Container Setup menu.
-
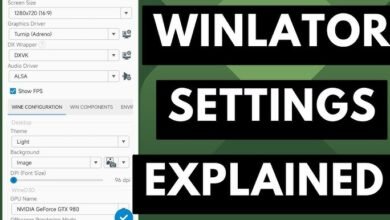
Configure these core parameters:
| Container Setting | Recommended Value | Why It Matters |
| Container Name | Main_Gaming_Container |
Easily identifies your main installation workspace. |
| Screen Size | 1280x720 or 1600x900 |
Keeps rendering overhead manageable for mobile GPUs. |
| Graphics Driver | Turnip (Adreno) | Essential for Snapdragon chips (Quest 3 / Pico 4). |
| DXWrapper | DXVK 2.x or DXVK 1.10.3 | Converts DirectX 9/10/11 calls directly into low-overhead Vulkan. |
| Audio Driver | ALSA | Provides low-latency audio sync with minimal CPU overhead. |
| Video Memory (VRAM) | 4096 MB |
Prevents high-res texture swapping crashes. |
| Box64 Preset | Performance | Speeds up real-time x86_64 to ARM translation. |
-
Tap the Checkmark (✔) at the bottom to finalize and generate your container.
Step 4: Transferring and Installing PC Games
WinlatorXR creates a virtual C: drive inside your headset’s storage while mapping your headset’s internal Download folder to the container’s D: drive.
Transferring Game Files to Your Headset
-
Connect your headset to your PC via USB-C.
-
Put on the headset and select Allow Access to Data inside VR.
-
On your PC, open File Explorer and navigate to your headset’s internal storage path:
Internal Shared Storage / Download / -
Copy your DRM-free PC game folder (e.g., games from GOG or offline installers) directly into this
Downloadfolder.
Running Games Inside WinlatorXR
-
Open WinlatorXR inside your headset.
-
Click the three dots next to your container and select Run.
-
Inside the virtual Windows desktop environment, open File Manager (or double-click the D: drive icon on the desktop).
-
Navigate to your transferred game folder, locate the game’s main executable (
.exe), and double-click to run.
Troubleshooting Common Installation & Sideloading Issues
1. SideQuest Displays “Device Unauthorized”
-
Cause: The headset didn’t receive or accept the USB debugging prompt.
-
Fix: Unplug the USB-C cable. Open the Meta Horizon / Pico smartphone app and verify Developer Mode is still toggled ON. Reconnect the cable, put on the headset, and accept the prompt.
2. WinlatorXR Missing From App Library
-
Cause: Sideloaded apps do not appear in the standard system app grid.
-
Fix: Open your App Library, click the top-right filter dropdown, scroll to the bottom, and select Unknown Sources.
3. Black Screen Upon Launching Container
-
Cause: Graphics driver mismatch or incompatible DXVK selection.
-
Fix: Edit your container settings. Switch Graphics Driver from Turnip to VirGL (Freedreno) or change DXWrapper from DXVK to WineD3D.